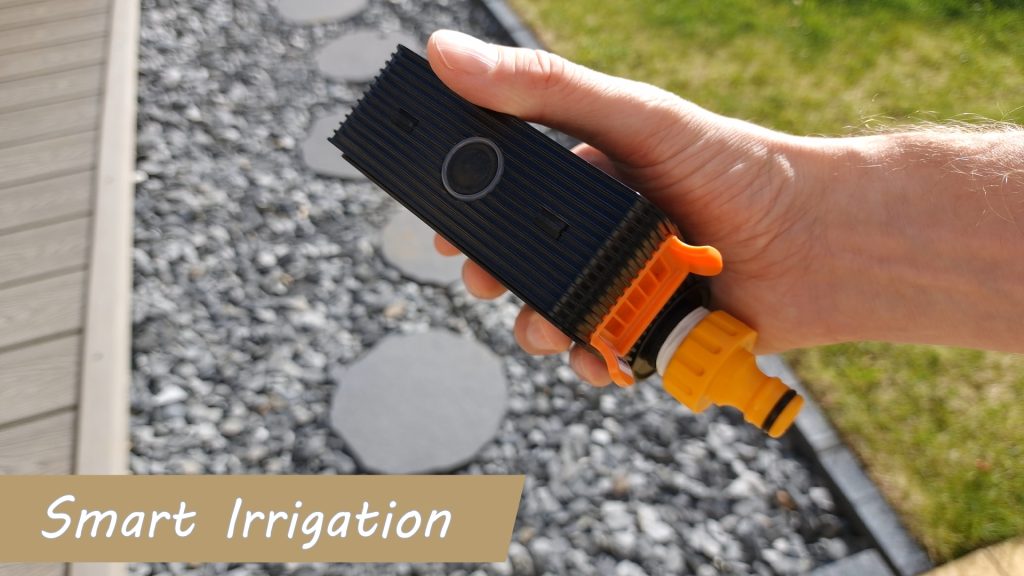
Automate your irrigation / watering system easily with the Sonoff SWV.
Why Automate Your Garden Watering?
If you’ve got a garden, you’ll know just how much effort it takes to keep your lawn and plants alive—especially during the summer. Dragging out the hose or going backwards and forwards with watering cans can become a bit of a chore and quite time consuming!
In this article, I’ll walk you through how I’ve automated the watering of my garden and plants using the Sonoff SWV Smart Watering Valve and what I’ve learned so far.
Spoiler: I now have 7 (yes, seven) of these devices, so you can tell I like them!
What Is the Sonoff SWV?
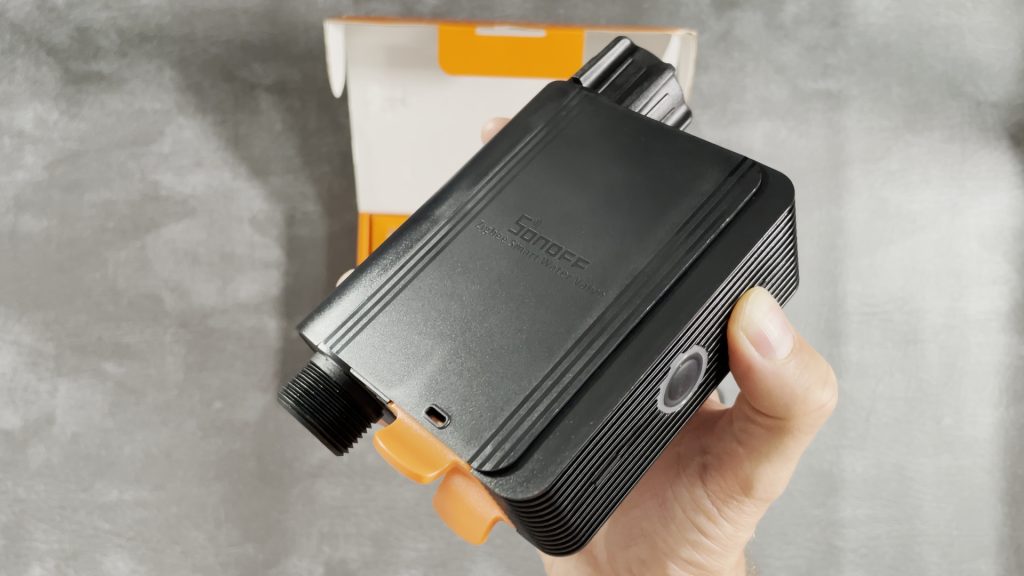
The Sonoff SWV is a Zigbee 3.0 smart water valve designed to sit between your outdoor tap and your hose or irrigation system and let’s you turn it on and off remotely.
It runs on 4x AA batteries, supports flow measurement, and is rated for water pressures between 0.6 bar and 8 bar, making it compatible with most household taps.
My Setup
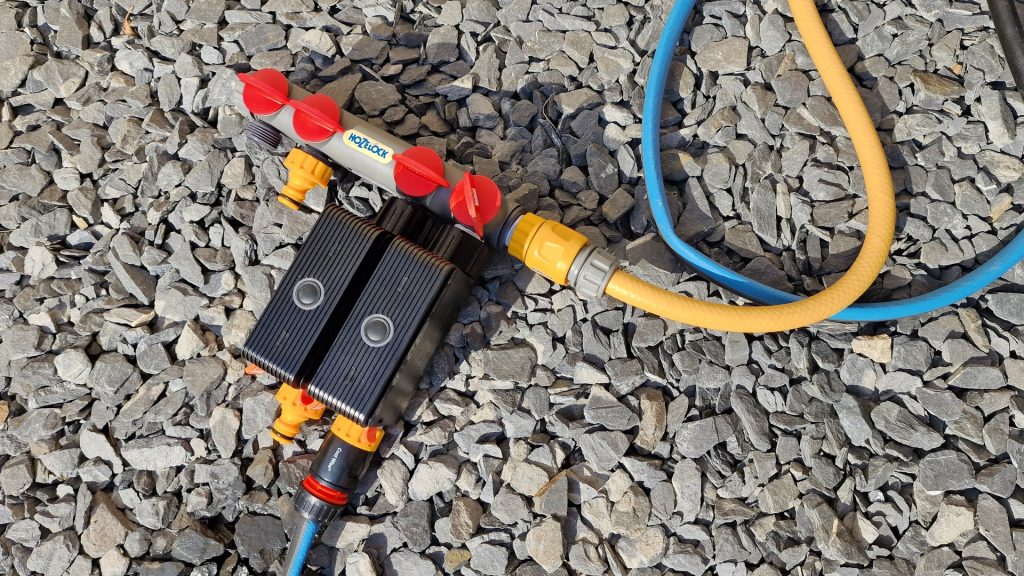
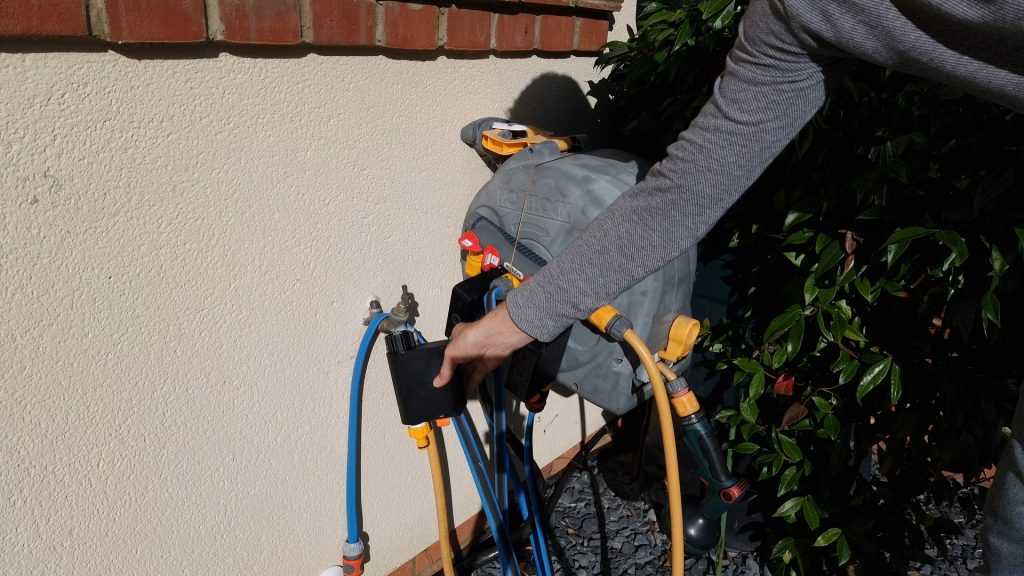
In my garden, I’ve got a four-way tap connector. This lets me keep the main tap fully open and individually control different sprinkler systems and irrigation lines using valves like this.
Currently, I have:
- Front Garden Sprinklers
- Back Garden Sprinklers
- Plants front and back
There is never going to be enough water pressure to water everything at once so I have multiple Sonoff SWV devices, one for each watering zone. Sprinklers in particular use a lot of water pressure so you want to have these on their own system and then water plants on a different system. It also depends on how close together the different zones are that you want watering. For my front garden I use a 19mm (3/4″) hose instead of a 13mm (1/2″) hose to try and maintain better water pressure on a long hose run.
I have a Sonoff SWV connected directly to the tap as a master valve. This serves a few purposes: If you only have this valve on whilst watering then it ensures that if you get leaks in other parts of the system or if for some reason a different Sonoff SWV gets stuck open, then you don’t end up wasting lots of water. If this main Sonoff gets stuck open for some reason then it’s also not an issue because the ones below it connected to each zone will be off. Of course nothing is perfect…if you get 2 failures at the same time or if the main Sonoff device physically splits open somehow (say in freezing weather) then you’re going to have a problem.
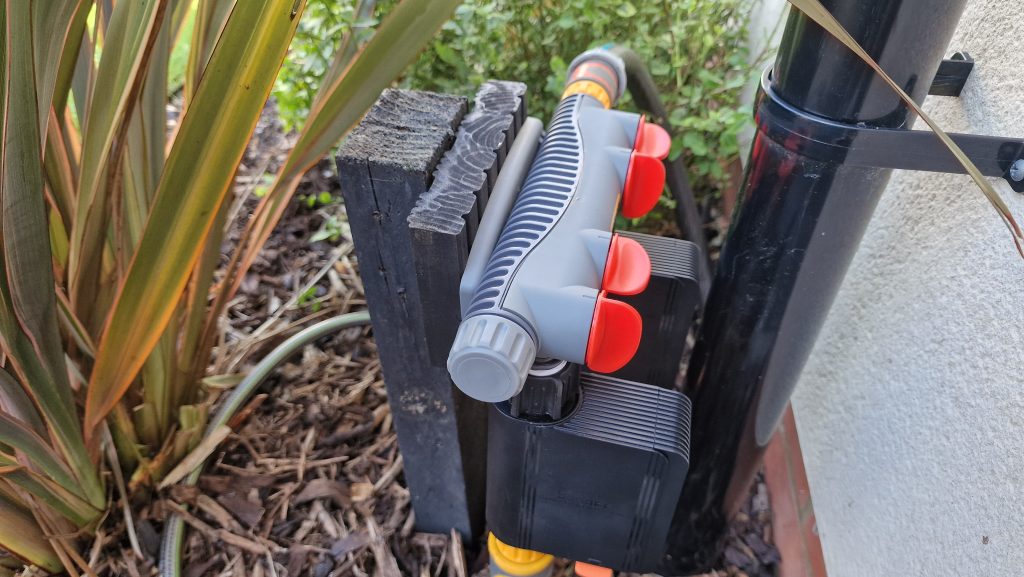
Note: You should have the valves in an upright position. The photo on the left with it on the floor is just whilst I was installing it.
Even without automation, just being able to press a button on the device is much easier than turning the tap manually. It also helps ensure consistent water pressure, since the tap stays in a fixed open position.
Zigbee Integration & Platform Support
The SWV uses Zigbee 3.0, so you’ll need a Zigbee hub to control it remotely. You’ve got a few options:
- Sonoff Zigbee Hub: Full functionality, including schedules and flow-based automation.
- Amazon Echo with Zigbee: Limited to basic on/off control.
- Home Assistant:
- ZHA: On/off support only
- Zigbee2MQTT: Full support including advanced features
I have only tried Home Assistant and this is my preferred option for most things. If you’re using Home Assistant with Zigbee2MQTT, I’ll cover automation options a bit further down.
Why I Like It
There are a few reasons I love this device.
- Flow Rate Monitoring
One of the standout features is its ability to measure water usage in real time. You can view how much water you’re using and even set watering limits based on litres instead of time. This is especially helpful if you’re on a water meter or trying to avoid over/underwatering plants in pots. - Battery Powered
Unlike solenoid valves I’ve used before, which need a power supply, the SWV runs on four AA batteries. I expect these to last the whole summer season. It also works with rechargeable batteries, though they may not last as long. - No Leaks (So Far)
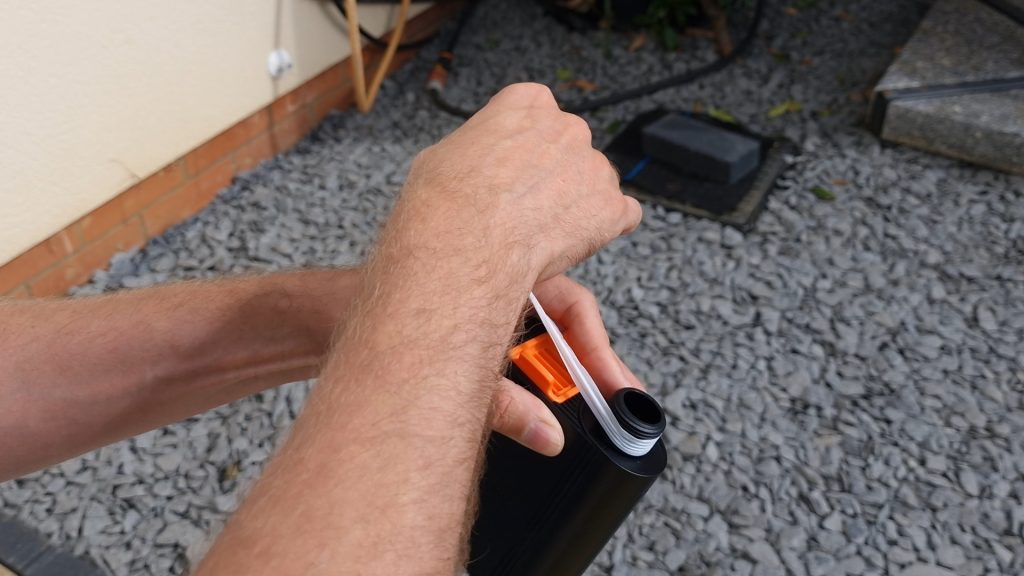
I’ve had issues in the past with cheap hose connectors leaking, but so far the SWV has held up well. I did use PTFE tape on the threads to help seal everything, which I’d highly recommend.
💡 Tip: Wrap PTFE tape in the direction the fitting will turn. Wrapping it the wrong way can cause it to bunch up or shred as you screw it on.
Installation
Installation is pretty straightforward:
- Screw the SWV between your outdoor tap and hose/irrigation pipe
- Use the included PTFE tape to ensure a watertight seal
- Pair it with your Zigbee network
- Ensure it’s within Zigbee range for reliable operation
There are two versions of the valve depending on your regional fittings (e.g., BSP vs NH thread), so make sure you buy the correct one for your location.
Using it in Home Assistant
If you’re using Zigbee2MQTT, the SWV supports timed and flow-based shutoffs, which are essential to avoid accidentally leaving it on.
Watering options:
- On/Off: You can use a switch to open and close the valve manually (NOT RECOMMENDED)
- Timed watering: You can send an MQTT command that turns the valve on for a set number of seconds or minutes.
- Flow-based watering: Alternatively, you can specify how many litres to use before automatically turning off.
This is a key feature because if the valve loses communication mid-session or drops a Zigbee message, it will still shut off after the defined time or volume—so no surprise water bills.
🛑 Caution: If you’re using ZHA or Echo Zigbee hubs, they don’t currently support these advanced features. I recommend avoiding those setups unless you’re happy with basic on/off only.
Home Assistant Automation Ideas
In Home Assistant, I’ve created button helpers that send MQTT commands with different time or volume presets. These buttons live on my dashboard and control each irrigation zone with one click. Check out the YouTube video for more information.
Recommended things to do:
- Create helper entities or scripts that accept a parameter (e.g., 10 litres or 5 minutes)
- Use template sensors to convert flow rate into litres per minute
- Track battery level and set up low-battery alerts
You will find some useful examples in my GitHub:
GitHub – Flow-based watering: https://gist.github.com/letsautomatenet/64955f8773b16d083808cd3ebba8409e
GitHub – Litres per minute template sensor: https://gist.github.com/letsautomatenet/6b70dac109b4876d05c2ea4a25d7823c
A Few Final Thoughts
- Cold weather: The SWV is rated down to 5°C. Since water freezes at 0°C, I bring my devices indoors over winter to avoid damage.
- Fail-safe setup: Install one valve directly on the main outside tap as a master shutoff. That way, if any of the secondary ones fail or get stuck open, you can cut the supply to all systems below it.
- Price: It retails for about £30 / $30, which I think is reasonable given its features. There are cheaper options on AliExpress, but I like the Sonoff build quality; you can also find the Sonoff SWV on AliExpress.
- Soil sensors: I’m experimenting with soil moisture sensors to automate things even more. My first sensor spammed the Zigbee network and died quickly, but a newer one I’m trying seems more reliable.
Conclusion
As you can probably tell, I’m really pleased with how the Sonoff SWV is working out. It’s taken a lot of the hassle out of keeping the garden alive—especially in hot weather.
If you’re automating your garden or have tips on better setups, I’d love to hear from you in the comments of the YouTube video.
Thanks, until, next time!